create github.io page
创建github.io page
创建github.io Page
主题: https://github.com/cotes2020/jekyll-theme-chirpy
主题演示: https://chirpy.cotes.page/
创建github仓库
- 创建名为
username.github.io的仓库,其中username为github账号名
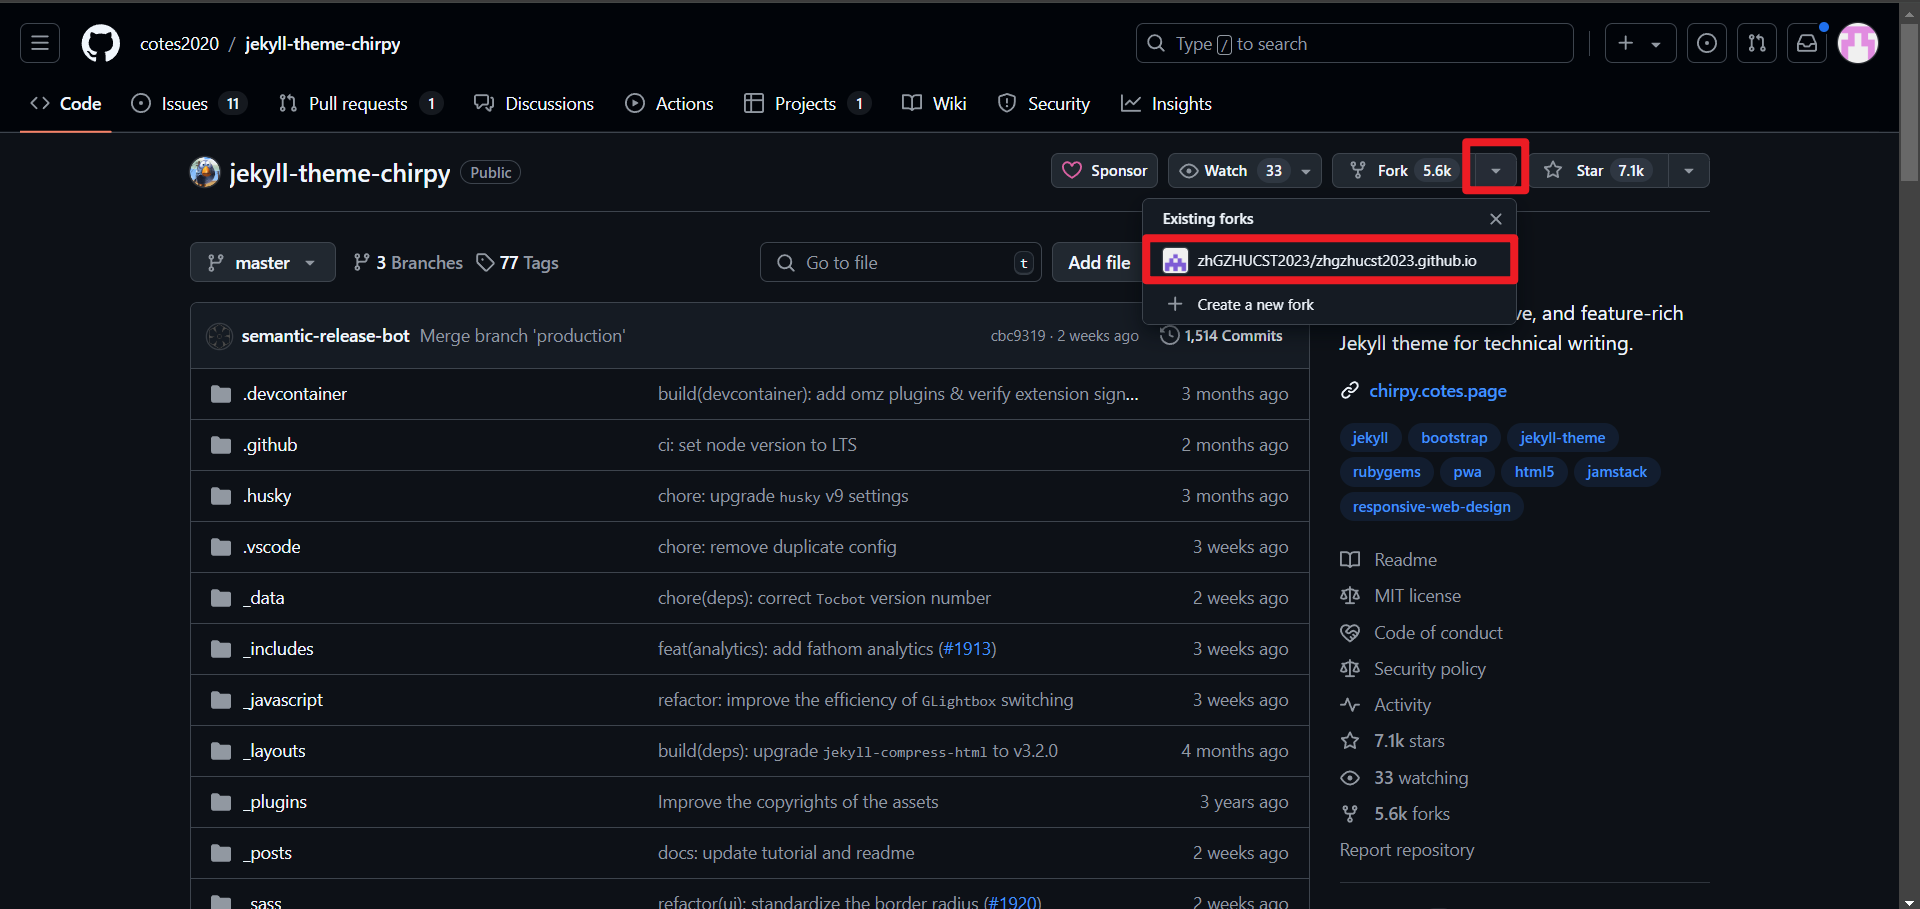
Fork主题仓库
- 访问github仓库
https://github.com/cotes2020/jekyll-theme-chirpy, 点击上侧 “Fork” 按钮,选择已创建好的username.github.io仓库,即可将主题仓库复制到自己的仓库
在容器环境内拉取username.github.io仓库并作初始化
通过Dockerfile创建专门的容器镜像
1
2
3
4
5
6
7
8
9
10
11
12
13
14
15
16
17
18
19
20
21
22
23
24
25
26
# 使用官方ubuntu作为父镜像
FROM ubuntu:latest

# 设置镜像维护者信息
LABEL maintainer="Zpekii" description="预安装各种工具、Ruby,用于拉取github.io仓库,用于发布github.io博客"

# 预安装工具、Ruby
RUN apt update && apt install -y \
	vim \
	nano \
	curl	\
	git	\
	rsync \
	ruby-full build-essential zlib1g-dev \
	&& rm -rf /var/lib/apt/lists/*

# 配置相关环境变量
RUN echo '# Install Ruby Gems to ~/gems' >> ~/.bashrc
RUN echo 'export GEM_HOME="$HOME/gems"' >> ~/.bashrc
RUN echo 'export PATH="$HOME/gems/bin:$PATH"' >> ~/.bashrc

# 安装 jekyll bundler
RUN gem install jekyll bundler

# 默认执行命令
CMD ["/bin/bash"]
在任意目录下创建文件名为
Dockerfile的文件,拷贝上述内容至创建好的Dockerfile,接着在当前目录下运行终端,执行1
docker build -t ubuntu:jekyll .
注意: 如果没有安装
ubuntu:latest镜像请先执行docker pull ubuntu:latest拉取
在
WSL中执行以下内容(”XXX”内容需要自行替换实际路径)创建专门容器1 2 3 4 5 6 7 8 9 10
sudo docker run -it --rm --name jekyll-shell \ -v /mnt/c/XXX/username.github.io:/mnt/Project \ -v data:/var/data \ -v /var/run/docker.sock:/var/run/docker.sock \ -v $HOME/.ssh:/root/.ssh \ -v $HOME/bin/conf/node/profile:/root/.bashrc \ -w /mnt/Project \ -e DOTNET_SYSTEM_GLOBALIZATION_INVARIANT=1 \ --network qnear \ ubuntu:jekyll bash
注: 配置文件
profile需要自行创建,我这里选择在$HOME/bin/conf/node/下进行创建,可以与示例不一致,满足需要即可内容如下:
1
2
3
4
5
6
7
8
9
10
11
12
13
14
15
16
17
18
19
20
21
22
23
24
25
26
27
28
29
30
31
32
33
34
35
36
37
38
39
40
41
42
43
44
45
46
47
48
49
50
51
52
53
54
55
56
57
58
59
60
61
62
63
64
65
66
67
68
69
70
#!/bin/sh
DATA_PATH=/var/data
BIN_PATH=/var/data/kApps
DEPLOY_PATH=/var/deploy

export CMAKE_HOME=$BIN_PATH/cmake

export GOROOT=$BIN_PATH/goLang
export GOPATH=$DATA_PATH/kUser/goUser
export GOPROXY=https://goproxy.cn,direct
export GOSUMDB=sum.golang.google.cn

export NODE_HOME=$BIN_PATH/node
export PNPM_HOME=/var/data/pnpm

export ANDROID_SDK_ROOT=$BIN_PATH/android_sdk
export ANDROID_HOME=$BIN_PATH/android_sdk

# PowerShell paths
#    $PSHOME is /opt/microsoft/powershell/7/
#     The profiles scripts are stored in the following locations:
#         AllUsersAllHosts - $PSHOME/profile.ps1
#         AllUsersCurrentHost - $PSHOME/Microsoft.PowerShell_profile.ps1
#         CurrentUserAllHosts - ~/.config/powershell/profile.ps1
#         CurrentUserCurrentHost - ~/.config/powershell/Microsoft.PowerShell_profile.ps1
#     Modules are stored in the following locations:
#         User modules - ~/.local/share/powershell/Modules
#         Shared modules - /usr/local/share/powershell/Modules
#         Default modules - $PSHOME/Modules
#     PSReadLine history is recorded in ~/.local/share/powershell/PSReadLine/ConsoleHost_history.txt

source /etc/os-release

if [ "$ID" = "alpine" ];then
  export PSHOME=/var/data/kApps/powershell_linux_musl_x64
else
  export PSHOME=/var/data/kApps/powershell_linux_x64
fi

if [ ! -f "${PSHOME}/profile.ps1" ];then
  echo "function Prompt {\"\$(Get-Location): \"}">"${PSHOME}/profile.ps1"
fi

mkdir -p $PNPM_HOME

export PATH="$BIN_PATH/python/bin:$CMAKE_HOME/bin:$PSHOME:$GOPATH/bin:$GOROOT/bin:$NODE_HOME/bin:$PNPM_HOME:$BIN_PATH/bin:$BIN_PATH/docker:$PATH"

if [ -z "$(which pnpm)" ];then
  npm install -g pnpm
fi

pnpm config set store-dir "$PNPM_HOME"
pnpm config set registry https://registry.npmmirror.com

git config --global credential.helper store
git config --global user.email "3156752796@qq.com"
git config --global user.name "Zpekii"

alias python=python3.12
alias pip=pip3.12

alias python3=python3.12
alias pip3=pip3.12
alias la="ls -A"
# Install Ruby Gems to ~/gems
export GEM_HOME="$HOME/gems"
export PATH="$ANDROID_SDK_ROOT/build-tools/34.0.0/:$NODE_HOME/bin:$ANDROID_SDK_ROOT/cmdline-tools/latest/bin:$HOME/var/data/kApps:$HOME/gems/bin:$PATH"
# Install Ruby Gems to ~/gems
export GEM_HOME="$HOME/gems"
export PATH="$HOME/gems/bin:$PATH"
进入到
username.github.io项目文件,执行1
tools/init.sh
等待初始化完成
接着在根目录执行安装依赖
1
bundle
编辑配置文件(_config.yml)修改信息
- 打开项目根目录下的
_config.yml - 修改必要参数:
url:username.github.iotimezoneAsia/Shanghailang:zh-CNgithub:username: 实际github账号名
social:links: 实际的社交账号链接
开启评论
使用github APP: gicus giscus
需要满足以下条件:
在
仓库下输入框输入仓库账号名/仓库名可以进行验证是否满足条件若满足,则进行下一步
在
Discussion分类的下拉框中选择推荐Announcements项,其他保持默认最后在
启用giscus中可以查看各个属性值,将属性值拷贝添加到_config.yml中的comments下对应参数,以下是一个示例数据giscus提供的数据
1
2
3
4
5
6
7
8
9
10
11
12
13
14
15
<script src="https://giscus.app/client.js"
        data-repo="username/username.github.io"
        data-repo-id="R_kgXXXXXA"
        data-category="Announcements"
        data-category-id="DIC_kwXXXXXWf9"
        data-mapping="pathname"
        data-strict="0"
        data-reactions-enabled="1"
        data-emit-metadata="0"
        data-input-position="bottom"
        data-theme="preferred_color_scheme"
        data-lang="zh-CN"
        crossorigin="anonymous"
        async>
</script>
_config.yml
1
2
3
4
5
6
7
8
9
10
11
12
13
14
15
16
17
18
19
20
21
comments:
  # Global switch for the post-comment system. Keeping it empty means disabled.
  provider: giscus # [disqus | utterances | giscus]
  # The provider options are as follows:
  disqus:
    shortname: # fill with the Disqus shortname. › https://help.disqus.com/en/articles/1717111-what-s-a-shortname
  # utterances settings › https://utteranc.es/
  utterances:
    repo: # <gh-username>/<repo>
    issue_term: # < url | pathname | title | ...>
  # Giscus options › https://giscus.app
  giscus:
    repo: username/username.github.io # <gh-username>/<repo>
    repo_id: R_kgXXXXXA
    category: Announcements
    category_id: DIC_kwXXXXXWf9
    mapping: # optional, default to 'pathname'
    strict: # optional, default to '0'
    input_position: # optional, default to 'bottom'
    lang: zh-CN # optional, default to the value of `site.lang`
    reactions_enabled: # optional, default to the value of `1`
上传图片
将图片路径改为(将图片移动到项目
assets/img目录下)/assets/img/YYYY-MM-DD-Title.assets/image.png图片markdown语法改为
html
本文由作者按照 CC BY 4.0 进行授权